| Until a future game comes out and says otherwise, all Red Alert 3 - Uprising missions are treated as canon. |
Raid on Lost Castle is the first mission of the Soviet campaign in Command & Conquer: Red Alert 3 - Uprising.[1]
Background[]
After the Soviet Union's defeat during the war, the Union was under the occupation of the Allies. European Union President Rupert Thornley assured the public that the Soviet people have embraced the Allies, and there is no evidence of an armed resistance despite rumours.
Unbeknownst to them, however, the Soviet Underground was gathering under the leadership of former intelligence officer Dasha Fedorovich, aiming to restore the Soviet Union.
Unfortunately, several scientists vital to the resistance's weapons development have mysteriously gone missing. Dasha believes that a recently discovered Allied research facility in Romania holds the answers to the scientists' whereabouts, and orders the resistance's latest member, a young field commander, to lead a small force into the area and investigate the facility.
New additions[]
Events[]
| “ | This base isn't run by the Allies, it is run by the FutureTech Corporation. What could FutureTech want here? - Dasha, noticing the center facility that is actually FutureTech |
” |
The Conscripts arrived at Romania in a steamboat and were ordered to gather the recon teams, after which they were to bring the scientists back to the ship and return to Russia.
The Conscripts first engaged and slaughtered two Allied Engineers mercilessly, taking their anger at losing the war out on them. The squad quickly pushed through the docks, engaging Allied patrols consisting of attack dogs and peacekeepers. Fortunately, the patrols were unprepared for an attack and fell quickly, though not without some wounds to some unlucky Conscripts, who were forced to the back of the group, as the squad could not afford to lose a single man.
The Conscripts rushed over to the dock exit, while Allied forces were beginning to be warned of the attack. As a Javelin soldier attempted to distract the group with rocket fire, more quickly barricaded themselves in the buildings nearby. Fortunately, the Conscripts were armed with their burning Molotov Cocktails and burned the Javelin soldiers out quickly.
The Allies meanwhile had taken aware of the attack and sent a large force of peacekeepers to eliminate the rebels. Fortunately, the Soviet squad quickly divided itself and rushed into the buildings nearby. As the counterattack got close, the Conscripts began opening fire. Peacekeeper after peacekeeper fell as the Conscripts killed them effortlessly behind the windows of the building. The shotguns of the peacekeepers were very ineffective against the houses and eventually, the Allied counterattack was stopped.
The Conscripts immediately filed out of the buildings and stopped beside some medical supplies in a crate left behind by the Allies, taking a breather while their wounded comrades replenished their health.
The Conscripts made their way over a bridge nearby spanning over a ravine, where a fireteam of Javelin soldiers were stationed below. As the Conscripts passed over, the Javelin soldiers quickly moved to intercept them. The Soviets piled inside a nearby building again and eliminated a two man team from one side. From the other side, the other two Javelin soldiers themselves fortified a building. The squad quickly switched to their Molotovs again and threw them inside, burning the soldiers out.
After fighting some Allied infantry, they encountered one of the recon teams. They then had proceeded to the other recon groups, while fighting Allied tanks and infantry which were paradropped by Century Bombers. Finally, the group managed to encounter the third recon team and then have to pass through a lot of Guardian Tanks in order to get to the last recon group - the Desolators. At this time, Dasha remarks that their toxins are useful against infantry.

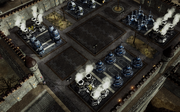
The FutureTech base
With all recon teams gathered, they proceeded to rescue the scientists. When they rescued each scientist, one of their rescuers told them the Allies had slaved them to develop a new kind of heavy artillery for them. When the group arrived at the center of the facility, there was a shocking revelation: this base is run by FutureTech Corporation!
But what exactly did they want with the kidnapped scientists for? Just as they were about to leave, FutureTech immediately countered the Soviets with Pacifier FAVs, which appeared out of nowhere and deployed their Grand Cannons to open fire. These apparently were the tanks the scientists had been forced to create. The Soviets and their scientists quickly ran for their lives. Fortunately, some of them escaped the Pacifiers and managed to arrive at the boat just when more FutureTech reinforcements arrived.
Walkthrough[]
The mission requires the player to manage a limited number of units. If all of the player's units are killed, the player will fail the mission. The player begins the mission with the a boat arriving at the docks with Allied Engineers station in which the player's Conscripts killed them. The number of Conscripts given at the start varies on the selected difficulty; 15 for Easy, 12 for medium, and 10 for hard. The player will be met with Peacekeepers and Attack Dogs and is then introduced to the Conscripts' abilities of using Molotov Cocktails to kill the Javelin Soldiers garrisoning civilian structures. The player will need to kill a few waves of Peacekeepers and Javelin Soldiers advancing at them; the player should make their Conscripts garrison into the civilan structures to take cover. After the final wave of troops that being a lone Engineer the player can proceed on to the next section, where they now encounter explosive barrels placed next to civilan structures alongside dealing with Allied garrisons.
Upon reaching the first marker, the player can now acquire Flak Troopers under their command which will be useful against the oncoming waves of vehicles. The first of these is an Assault Destroyer with its Black Hole Armor active surrounded by Multigunner IFV units (two in Easy or four in Normal and Hard) with Engineers inside of them which will repair the Assault Destroyer. To deal with this, use the Conscripts' Molotov Cocktails to kill/destroy all of the units other than the Assault Destroyer (as Molotov Cocktails are not affected by the Black Hole Armor), then destroy the Assault Destroyer and take out the walls behind the vehicles, prompting the walls to be "refunded". Afterwards, the player will then have to watch for Allied infantry troops being para-dropped to the battlefield by a Century Bomber, taking on the Athena Cannons as well as other units. The Athena Cannons will fire their orbital lasers when idle although, they will often immediately deploy their Aegis Shield when approached. The player should use the Flak Trooper's Magnetic Mines to quickly destroy the Athena Cannons while the Conscripts deal with the Javelin Soldiers. The player will likely have casualties against the group against an Athena Cannons and Peacekeepers.
After this, the player will be able to recon with a group of five Tesla Troopers which can be used to handle the next group of enemy Guardian Tanks. Avoid having the other infantry units get near them as the tanks will attempt to run them over. and use the Tesla Troopers' EM Disruptors to disable them. After dealing with the Guardian Tanks, the player will finally reach the last recon point of the first primary objective gaining four Desolator Troopers.
After gaining the Desolator Troopers and a cutscene depicting a gate opening to unload a huge wave of Allied infantry troops, these troops will proceed to attack the player's troops; the player should have their troops garrison the nearby civilian structures to take cover while dispatching them. After this, the player must now step past the gate, which will automatically transport all of the player's units past the gate as it shuts behind them. The player will now be required to rescue the three Chief Scientists by moving to the designated markers on the battlefield. Each marker will have the Chief Scientist walled in, surrounded by numerous troops, a Boot Camp or Armor Facility and a Multigunner Turret. The turrets and unit production structures should be destroyed first to prevent the player from being overwhelmed. Destroying the walls (ie. by attacking them directly or a nearby barrel) will immediately free the Chief Scientist under the player's command. Note that the Chief Scientist are able to replenish the health of all nearby friendly infantry troops, allowing the player to rest up before moving into the other parts of the bases to rescue the remaining Chief Scientists.
When the player has less than four Conscripts or Flak Troopers, or less than three Tesla Troopers, the player will receive five of those units to the location where most of the player's units are via a Twinblade after the on-screen timer has elapsed. Note that Desolator Troopers cannot be replenished. After the player has rescued all of the Chief Scientists, they cannot receive any reinforcements.
The player must now escort at least one Chief Scientist to the port where the player's troops were present at the start of the mission. The player must be vary of the Pacifier FAV's long range artillery weapons. A safe strategy to deal with the Pacifier FAV is to have a Tesla Trooper approach it, then use the EM Disruptor to disable them once the Tesla Trooper is in close proximity. Then mobilize all of the other forces to destroy it. In Normal and Hard, the player will need to deal with more Pacifier FAVs on the road to the dock. In addition, more para-dropped troops are present. Once all Chief Scientists that are alive are present at the dock area, the mission is completed.
Mission[]
- Find some reinforcements around the area
- Free the Scientists
- Make Sure at least 1 Scientist escapes the site
- Bonus: Make Sure all Scientists escapes the site.
Trivia[]
- This mission must be completed to unlock the Allied and the Imperial campaigns.
- There is a bug that can be seen at the end of this mission where, rather amusingly, any FutureTech soldiers near the steamboat will run off the edge of the dock and run through the sea.
Videos[]
References[]
- ↑ Electronic Arts Los Angeles, Command & Conquer: Red Alert 3 - Uprising. Soviet mission 1: "Raid on Lost Castle".